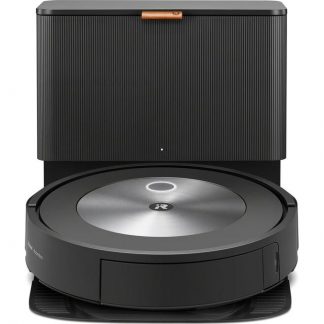
iRobot Roomba i7+ i7558

(1 customer review)

£436.46

Make cleaning easier with iRobot iRobot Roomba i7+ i7558! The vacuum cleaner has a height of 92 mm, so it can vacuum under most beds and sofas.

Category: Tags: ,

Description

iRobot iRobot Roomba i7+ i7558 can without any problem move over regular doorsteps in your home. This robot vacuum cleaner works best on hard materials, such as parquet or tiled floor. It can also vacuum short-haired carpets properly. Equipped with a HEPA-filter, the vacuum cleaner can clean your home thoroughly.

For those of you who rather spend your time on something other than vacuuming, a cleaning robot is a really great choice.

1 review for iRobot Roomba i7+ i7558

  1. Emily

    The iRobot Roomba i7 is an impressive choice from iRobot’s line of robot vacuums.
    I own it for over a month and I am very impressed.

    The fact is that this is my first cleaning robots but I have made a lot of research before buying it on this site.

    The Roomba i7 has impressive mapping software, is quite “smart” as it can learn quickly, and can handle various floor types including hardwood, tile, and vinyl without issue.

    It also has a nice cell phone app that allows you to label rooms and set up cleaning tasks. Tests show that the i7 does an excellent job at cleaning surface dirt on carpet and hard floors and it’s built-in HEPA filter leaves no dust smell in the air. Although it is quite noisy and takes a long time to clean, overall the iRobot Roomba i7 is a great robot vacuum that is worth considering.

Add a review

Your email address will not be published. Required fields are marked *

Frequently Asked Questions:

How can I schedule regular cleanings using my iRobot Roomba J7?

To schedule regular cleanings with your iRobot Roomba J7, follow these steps:

1. Connect the Roomba to Wi-Fi: Ensure that you have successfully connected your Roomba J7 to your home Wi-Fi network. This allows you to use the iRobot Home app for scheduling and monitoring cleaning tasks.

2. Download the iRobot Home app: If you haven't already, download and install the iRobot Home app on your smartphone or tablet. The app is available for both iOS and Android devices.

3. Register and sign in to the app: Create an account by providing your email address and password. Then, sign in to your iRobot Home app using these credentials.

4. Connect your Roomba J7 to the app: In the iRobot Home app, click "Add" at the top of the screen, then choose "Vacuum." Search for your Roomba J7 and connect it to your account by following the on-screen prompts.

5. Schedule a cleaning task: Once your Roomba J7 is connected to the app, tap the "Clean" button in the center of the home screen. Here you can select a specific room or area that you want your Roomba to clean. Alternatively, you can choose "Custom" and create a customized cleaning schedule based on your preferences.

6. Set up a recurring cleaning schedule: To set up a regular cleaning schedule, tap the "Scheduled Cleaning" button at the bottom of the screen. You'll see options for setting daily, weekly, or monthly schedules. Select your desired frequency and time slots, then confirm your changes by tapping "Save."

Your Roomba J7 will now automatically start its cleaning tasks according to the schedule you have set up in the iRobot Home app. You can always adjust or cancel your scheduled cleanings as needed.

What is the best cleaning mode for my Roborock S7 MaxV Ultra to use on hardwood floors?

The best cleaning mode to use for hardwood floors with your Roborock S7 MaxV Ultra is the "Quiet Mode" and select "Hard Floor" in the app or on the robot itself. This will ensure that the robot uses the appropriate suction power and sweeping pattern designed for hard floor surfaces, and minimize any potential damage caused by excess force from brushes or vibrations.

How do I set up and use my Xiaomi Roidmi Eve Plus for the first time?

Here's a step-by-step guide to help you set up and start using your Xiaomi Roidmi Eve Plus for the first time:

1. **Charge the battery:** Before starting, make sure the battery is fully charged. Connect the charging cable to the power outlet and attach the other end to the EVA Plus vacuum cleaner. The charging LED indicator will light up during the charging process, which usually takes about 2-3 hours for a full charge.

2. **Install the dustbin:** After charging, remove the dustbin from its compartment on the back of the unit. To install it, simply press the lock button at the bottom and insert it into the designated slot until you hear a click. Ensure that the dustbin is correctly installed before proceeding with the setup process.

3. **Download the Roidmi App:** Visit the App Store or Google Play Store on your smartphone and search for "Roidmi" to download the official Roidmi app. Install it, and then open it to get started.

4. **Pair your EVA Plus with the app:** Open the Roidmi app on your smartphone and tap on "Device" located at the bottom of the screen. Select "New device," then choose "EVA+" from the list. You will be prompted to enter a four-digit code displayed on your EVA Plus vacuum cleaner's LCD screen. Enter the code correctly, and your device will automatically connect to your smartphone via Bluetooth.

5. **Configure settings:** Once connected, you can customize various settings such as suction power mode, scheduling automatic cleaning times, and more within the app. You can also access helpful tips and troubleshooting guides if needed.

6. **Begin using your EVA Plus vacuum cleaner:** With everything set up correctly, you're now ready to start using your Xiaomi Roidmi Eve Plus vacuum cleaner! Simply press the power button on the device or use the app to control it remotely. Clean your floors and enjoy a hassle-free cleaning experience with your new Xiaomi Roidmi Eve Plus vacuum cleaner!

Can I change the virtual walls' battery on my Roborock S7 MaxV robot vacuum?

Yes, you can change the virtual wall's battery on your Roborock S7 MaxV robot vacuum. To do this, follow these steps:
1. Turn off the Roborock S7 MaxV robot vacuum and unplug it from the charging dock.
2. Locate the virtual wall that needs its battery changed. It is usually attached to a base station or charging dock with a cable connected to it.
3. Press and hold the power button on the virtual wall for 5-6 seconds until you hear a beeping sound, indicating that the virtual wall has entered sleep mode.
4. Unplug the virtual wall from its charging base or station.
5. Remove the battery cover of the virtual wall by pressing the small buttons located on both sides of the virtual wall.
6. Carefully remove the old battery and insert a new one in the same orientation as the previous one. Make sure you use a compatible battery with the correct voltage and capacity.
7. Replace the battery cover and press it back into place until you hear a click, ensuring that it is properly secured.
8. Plug the virtual wall back into its charging base or station and wait for it to charge completely. It may take up to 2 hours for the charging process to complete.
9. Once the virtual wall has been fully charged, press the power button again to wake it up. You should hear a beeping sound indicating that the virtual wall is now active.
10. Turn on your Roborock S7 MaxV robot vacuum and resume using the virtual walls as needed.