

Oval or round multi cookers have many advantages. For example because they don’t use any metal, they do not need to be maintained.
They are lighter and smaller than most other stovetop cookers which gives you greater control over what you cook. Plus, they are convenient. They store in any of the many ways that are currently in use in the home, from a cupboard drawer to a pantry to a garage. They can be used outdoors when temperatures are low and in cooler weather when temps soar.
I recently bought one and started looking for alternatives to my old cooker. It would be interesting to compare it to any stove and compare results from my own home. I would like to test different types of stove, to see which is best suited to my needs. So, I did some research and found some very interesting articles in the cookbooks section of Amazon.com to help me understand the differences between each stove and how I might go about installing it in my home. I’ve included these recipes here and they should provide you with the inspiration you need to make these cooking items and other kitchen equipment. You do have to make do with what you can find on the Internet though. There are no cookbooks on the market that tell you exactly what type of stove you need to install.

The following will be a quick guide to making my own cooker and its components, including a video which will show you how. I am just showing you what I have to do to get started, which should also give you some ideas how to proceed.
Step 1. Get an Aluminum Kitchen Table
I used a cheap metal table because it was inexpensive and I thought it would work well with this project. A table that has a wide range of surfaces and dimensions should also work well. You can find these from almost any hardware store, usually at a price of around $10 or more. I used this table as it is inexpensive, but I will add that it was too wide for a kitchen table.
Step 2. Select a Wooden or Aluminum Table to Build A Cookout
If you’ve ever been to a woodworking show, the tables look pretty good. They are made in a variety of colors (brown, green, yellow, black, gold, etc.), and are typically made of hardwood which gives a woody look that is very desirable in a kitchen. I have never seen wood tables in my life in any other kitchen or outdoor space besides my home on a very hot day so this is not a good idea unless you’re an experienced woodworker or you live and work around the woods.
In addition to the table I bought that night, I also picked an old kitchen stove for this project.
It’s hard to see in many kitchen shows because you can’t see any wood. However, you can easily identify wood stoves by looking at the metal pieces on them. The wood you will be using in this cooker and stove is all wood that has been treated with a wood preservative called Acetoxylon, which is made from wood pulp. It will keep the wood burning and will provide a durable wood finish.
Step 3. Make Your Own Cooking Equipment In A Wood-burning Kitchen
The first step for this project is to decide what type of cooking equipment you should have. You will be buying cooking pots and pans that have a range of different cooking pots or pans.
The most common type of stoves and cookers I have seen are the gas-powered cooktops. Gas cooktops are generally large electric appliances that are used for boiling hot water, boiling liquids, and steam. These stoves and cookers work best with electric ranges, which are larger and more durable than wooden or plastic ones. Gas cooktops are also usually quite long and can be difficult to install

I completely agree with the author of this article. As a serviceman, I’ve had the opportunity to work with various types of multi-cookers, and I must say that oval or round multi-cookers have revolutionized the way we cook. They’re not only convenient but also offer a lot of benefits such as being lightweight, smaller in size, and easy to store.
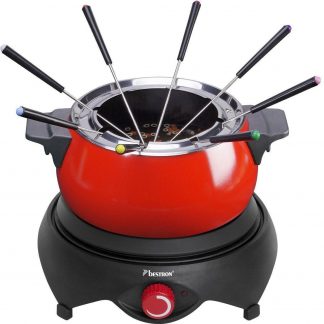
From my personal experience, I would add that these multi-cookers are also very versatile. You can use them for cooking a variety of dishes, from soups to stews, and even desserts like fondue. The fact that they don’t require any metal parts makes them easy to clean and maintain.
One tip I would give is to choose a high-quality oven or cooktop that’s specifically designed for these types of multi-cookers. This will ensure that the cooking process is smooth and efficient.
In terms of storage, I recommend investing in a good quality cabinet or pantry that can accommodate your multi-cooker. This will keep it safe and out of reach from children and pets.
Lastly, I would advise against using wood-burning stoves for cooking purposes. While they may seem like a cost-effective option, they’re not the safest choice and can be hazardous to health. Stick with electric or gas-powered cooktops for a safer and more efficient cooking experience.